Yes, 29 more work days, have occurred with more than 120 hours, averaging four hours and nine minutes per day. These included five more work at home days, refinishing the cabin sole, which was the biggest project of the winter. These 29 days, together with the 23 earlier ones between haul out on October 14 and January 22, makes for a total of 52 work days this winter season, with a few more to go to clean the interior, continue to compound and wax topsides, launch, mount head sails and bring ILENE from New Rochelle to the Harlem.
What was accomplished during these 29 days? I mean other than the regular attention to:
+the bilge,
+snow on the cover,
+scrubbing the bottom in parts with maroon Scotchbrite and applying paint left over from last year to the waterline, bow, keel and rudder (the spots where it washes off more quickly),
+sanding and four coats of Velox paint to the prop,
+replacing all of the zincs,
+uncovering and transporting the winter cover from New Rochelle to City Island (half of it to Doyle Sails for replacement of a broken zipper),
+bringing the sails in the opposite direction, and
+compounding and waxing everything above the water line.
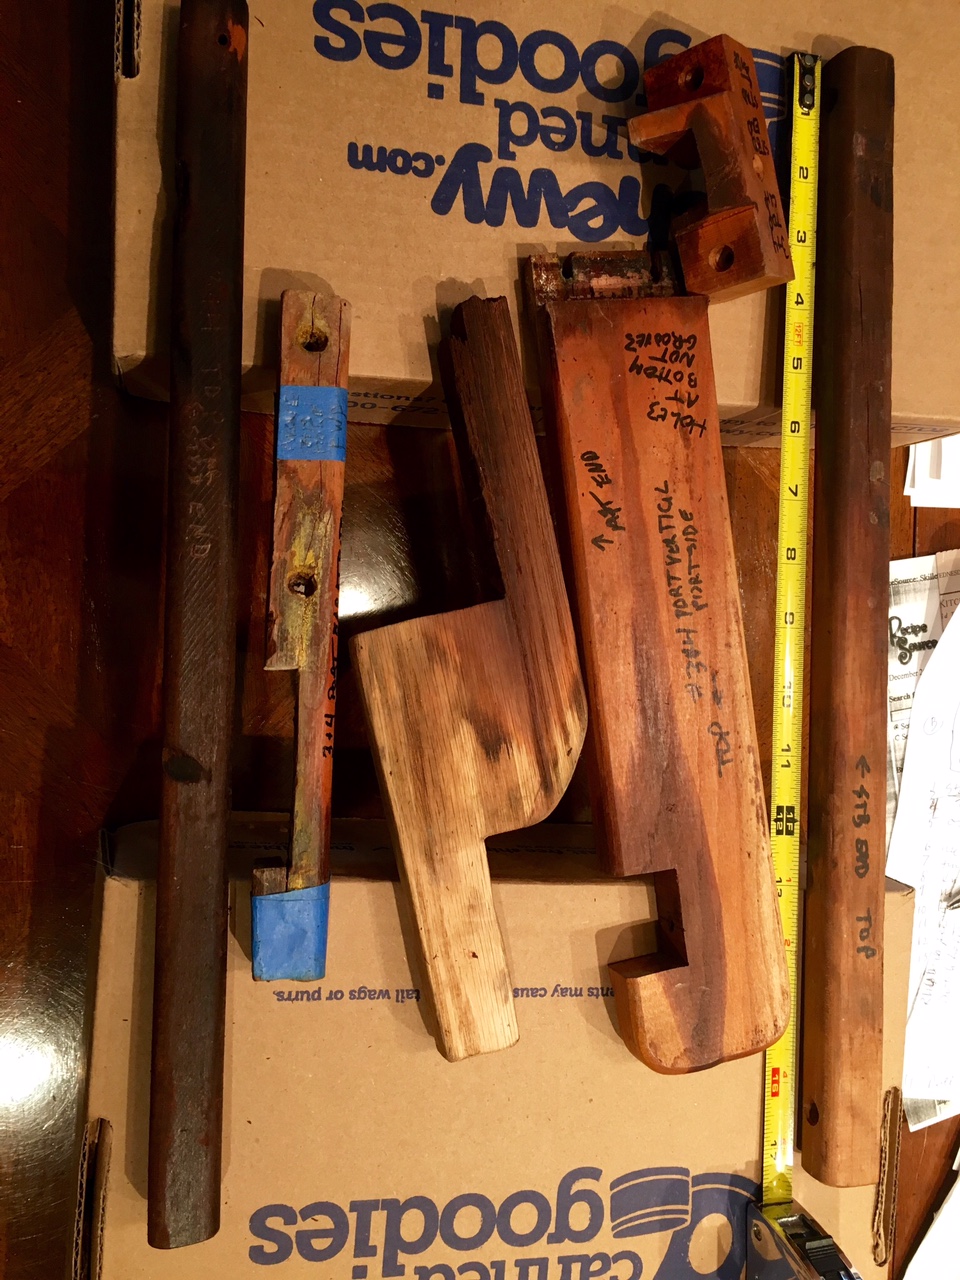
The newly repaired cabin sole boards, except for two large ones that are reserved for next winter's work, are completed and reinstalled. You see the old finish, top, and the new.
 They shine, but teak is a strange wood and some of the teak bungs, as you can see, do not match the color of the rest of the sole making for an interesting abstract pattern.

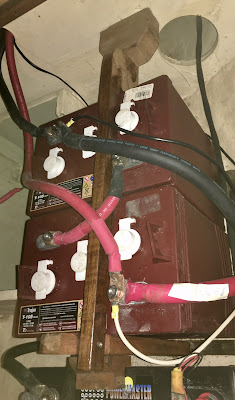
Don came through with new wooden sticks to hold the batteries in place that match and replace the old ones. Repeated little drips of battery acid had so rotted them after 18 years of use, that they were no longer strong enough to do their job.
 The darkly stained pieces show the effect of the acid.
I coated the new wood rods over the batteries and their "holder" pieces with resin so they should last longer than the next 18 years. Thanks, Don.

I spent a lot of time and money on lines this winter, the strings that run everywhere on sailboats. I had fead the bright idea to put the four halyards, one for each of the four sails (main, jib, genoa and spinnaker), through the washing machine and a fabric softener rinse after 18 years aloft. And I ran messenger lines to be able to pull the halyards back up to the top of the mast and back down through the interior of the mast in the spring. But the line I used for the messengers was to thin and two of them broke. I bought a stronger 125 foot line, used the remaining cheapo messengers to get the sturdy messenger in place and then the sturdy messenger to get the headsail halyards into place. The two that broke required me to engage Jeff Lazar, the terrific local rigger. He has a climbing apparatus that connects to any stout halyard by which he climbs to the top without the need for me to haul him up in a bosn's chair. But how to get lines from the top of the mast to the narrow slots near its base where the halyards exit? Jeff uses a clevis pin attached to a length of thin but strong chain. Gravity pulls the pin to the point inside the mast where I was able to use Jeff's grabbing tool to extract it from the slot. After that he attaches the end of the halyard he had brought aloft to the end of his messenger permitting me to pull the halyard down through the mast.
But I needed two additional expensive visits from Jeff to get ready to sail. While aloft to insert the halyards, he noticed that a bearing at the top end of the foil of the Genoa roller furler was missing so he ordered the part and returned a few days later and installed it.
Jeff's third visit to ILENE was to re-rivet a "D" ring to the starboard side of the mast (above the second spreader) to which a small block is attached, The Lazy Jacks of the stack pack are tied to a line through that block so the stack pack can be adjusted to the correct height. I had apparently broken the D ring off while raising the main. I prepared for Jeff's visit by removing the half rivets contained in the D ring's attachment holes with hack saw, Dremel tool and hammer, and cleaned off the rust. Jeff drilled out the other parts of the rivets, remaining in the mast, and used his rivet gun to reattach the D ring.
I actually managed to fix another screw up myself: In the fall, I had put a big knot in the aft end of the first reefing line. The purpose was so its end would not pull forward into the interior of the boom when I snugged it up. But unfortunately I put this knot at the lower rather than the upper half of the opening at the aft end of the boom, thus achieving the worst of all possible outcomes: the knot was at the forward end of the boom, too big to be pulled out at that end, and it was fourteen feet from the aft end of the boom! My first plan was to use my 25 foot electricians tape, to snake it out, by fastening a pick to the steel tape's end with tape, and feeding it forward till it grabbed the knot. No luck, the first pick is still in the boom. I tried again, this time lashing the pick to the snake so it could not pull off, but it did not grab. Plan B did work. I taped and tied the end of the snake to the portion of the errant reefing line just forward of the knot and used the tape to push the knot aft through the boom. I got to 18 " of the aft end, when this method failed to make further forward progress. With another pick, attached to a stick, I was able to reach in, grab the knot and pull the line out the last 18 inches. As to the pick that is still in the boom, I tested the second one and learned that they are magnetic, while the boom is aluminum. So I attached a pretty strong magnet to the end of the snake and approaching from the aft end, tried to grab the pick with the magnet. No luck yet. It's being magnetic means that it is not stainless steel and will likely rust. Any ideas for me on how to get it out?
My final string play this winter involved a sturdier set of blocks and line to hoist the aft end of the dinghy (the heavy end that has the outboard and fuel tank) up from the sea to the port end of the davit bar. This had been very heavy and required me to use the power winch at the coach roof to get it up. The reason was that the equipment was too flimsy for the load, with 1/4" diameter line over sheaves with 7/8" diameter. In fact the center sheave of the block had been scraped away by the line under pressure, exacerbating the problem. One aspect of the solution is the use of new 5/8" diameter line over much larger blocks. But the other part of the problem was that the old rig had three sheaves at the top and only two at the bottom. The newer equipment that I ordered and have now installed adds an extra sheave to the system which should halve the force required to lift the dinghy. 1) the Good small tackle, to starboard; 2) the worn away center sheave of the bad block that was to port; 3) the new heftier rig.


The platform looks better than before, I think.
No comments:
Post a Comment